 how-to
How to Clean Under a Dental Bridge: Step-by-Step Guide
Table of Contents
- Why Cleaning Under a Dental Bridge Matters
- Tools You Need to Clean a Dental Bridge
- Step-by-Step: How to Clean Under a Dental Bridge
- Signs of Infection Under a Dental Bridge
- Implant-Supported vs. Traditional Bridges: Cleaning Differences
- Common Mistakes to Avoid When Cleaning a Dental Bridge
- Post-Cleaning Inspection and When to See a Dentist
- Conclusion
- Frequently Asked Questions
Last Updated: September 19, 2026
Why Cleaning Under a Dental Bridge Matters
Learning how to clean under a dental bridge is one of the most important skills you can build for your long-term oral health. A dental bridge is a fixed row of false teeth held in place by crowns on the teeth on either side of a gap. The gap underneath, called the pontic space, is where trouble hides.
Food debris collects there. Plaque buildup follows. Without daily cleaning, that space becomes a breeding ground for gum disease and decay in the abutment teeth that hold your bridge.
Tools You Need to Clean a Dental Bridge
The right toolkit makes cleaning under a bridge fast and thorough. You do not need anything exotic. A few inexpensive items from any pharmacy will do the job.
Here is what to gather:
- A soft-bristled toothbrush and fluoride toothpaste
- Floss threaders or super floss for threading under the bridge
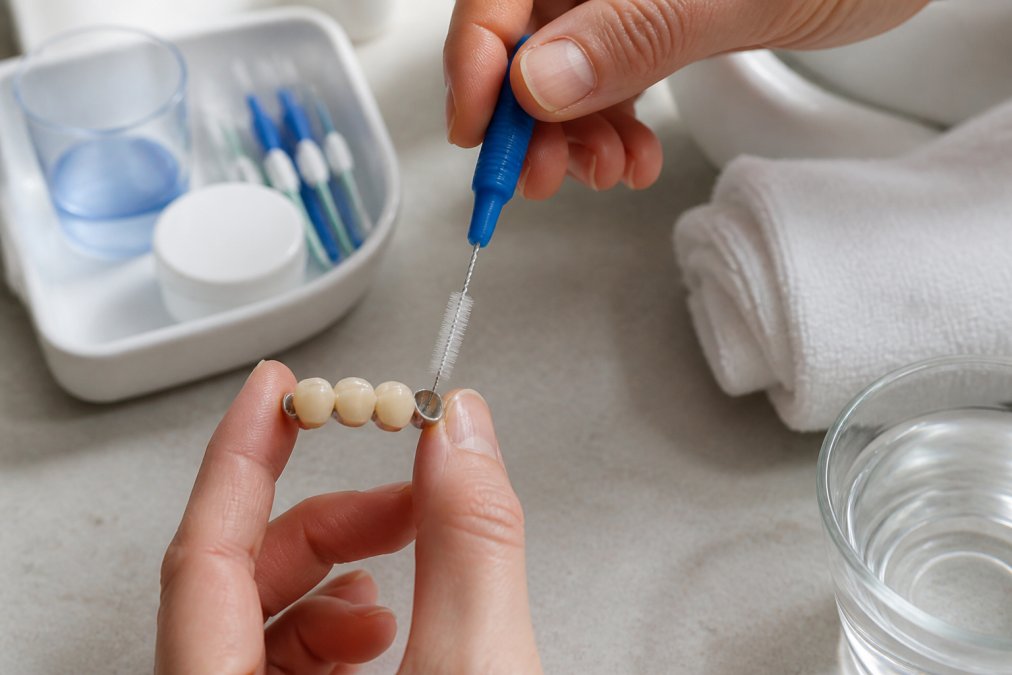
- Interdental brushes in a size that fits the gap
- A water flosser or oral irrigator
- A dental pick or proxy brush for tight spots
- A small mirror for checking your work
Choosing Toothpaste and Rinse for a Bridge
Most whitening toothpastes contain abrasive agents such as silica or alumina that can dull or scratch porcelain and composite surfaces over time. A common pattern is for patients to notice their bridge losing its polish after months of using a whitening paste. Choose a non-abrasive fluoride toothpaste labeled for sensitive teeth or enamel care. Avoid charcoal-based pastes for the same reason.
Sizing Interdental Brushes Correctly
Interdental brushes come in graduated sizes, usually color-coded from pink (smallest) to blue or yellow (largest). The correct size passes through the gap under the pontic with light resistance and touches both the gum and the bridge surface without forcing. If the brush bends or will not pass, size down. If it slides through with no contact, size up.
Dexterity Aids for Arthritis or Limited Hand Mobility
Most guides assume full hand function. If you have arthritis, tremor, or reduced grip strength, standard floss threaders can be frustrating. Several adaptations help:
- Floss picks with a long handle reduce the fine motor demand of threading.
- Electric flossers with a vibrating tip can slide under the pontic with less hand control.
- Water flossers with a wide grip and a rotating nozzle let you reach the back of the bridge without wrist strain.
- Built-up handles on toothbrushes (foam tubing or silicone sleeves) make gripping easier.
- Sitting in front of a mirror at eye level rather than leaning over a sink reduces neck and shoulder strain.
Best Floss for Dental Bridges
The best floss for dental bridges is super floss or a floss threader paired with regular floss. Both let you pass the floss under the pontic, something a standard floss strand cannot do on its own.
Interdental Brushes and Dental Picks
Interdental brushes reach the sulcus, the small groove where the bridge meets the gum. These tiny bottle brushes come in graduated sizes. Your dental team can tell you which size fits your bridge.
Canadian Dental Association oral hygiene resources
Step-by-Step: How to Clean Under a Dental Bridge
Cleaning under a dental bridge takes about two minutes once you build the habit. Follow these steps twice a day, morning and night.

- Brush first. Use a soft-bristled toothbrush and fluoride toothpaste. Angle the bristles toward the gum line and brush in small circles for two minutes.
- Thread your floss. Push the stiff end of super floss, or your floss threader, under the bridge between the pontic and the gum.
- Floss the sides. Wrap the floss around each abutment tooth and slide it up and down the side. Use a gentle up-and-down motion, not a sawing one.
- Clean under the pontic. Move the floss or brush back and forth under the false tooth to sweep out food debris.
- Rinse. Swish water or mouthwash to clear loosened particles.
- Repeat on both sides. Every bridge has two ends. Clean both.
Using a Floss Threader or Super Floss
Thread the floss under the bridge, then wrap it around the abutment tooth in a C shape. Slide it gently below the gum line. Move it up and down two or three times. Unwrap, pull the floss out, and move to the next section.
How to Use a Water Flosser for Bridges
A water flosser, also called an oral irrigator, sprays a thin stream of water that flushes out debris. Fill the reservoir with warm water. Set the pressure to the lowest setting at first. Aim the tip at a 45-degree angle toward the gum line and trace along the bridge edge.
Signs of Infection Under a Dental Bridge
Signs of infection under a dental bridge include swollen or bleeding gums, bad breath that will not go away, a bad taste, and pain when you bite down. Redness around the bridge edges is another early warning.
Watch for these symptoms:
- Gums that bleed when you brush or floss
- Persistent bad breath or a metallic taste
- Swelling or tenderness near the bridge
- A loose bridge or a pontic that shifts
- Pain when chewing
Implant-Supported vs. Traditional Bridges: Cleaning Differences
Implant-supported and traditional bridges need different cleaning approaches. A traditional bridge anchors to crowned natural teeth. An implant-supported bridge anchors to titanium posts set in the jawbone.
Clearance Gaps and Why They Matter
A traditional bridge typically has a small gap between the pontic and the gum, often 1 to 3 millimeters. That gap is where floss and interdental brushes do their work. An implant-supported bridge often sits closer to the gum with a narrower clearance, sometimes less than 1 millimeter. That tighter space changes which tools fit.
Cleaning Protocol by Bridge Type
| Bridge Type | Anchor | Main Risk | Cleaning Focus |
|---|---|---|---|
| Traditional | Crowned natural teeth | Decay in abutment teeth | Floss under pontic, brush gum line |
| Implant-supported | Titanium implants | Peri-implantitis | Irrigate around implant base |
For a traditional bridge, the priority is removing plaque from the abutment teeth where they meet the gum. Decay starts there. Floss threaders or super floss wrapped in a C shape around each abutment, plus an interdental brush at the gum line, covers that zone.
What Both Types Share
Both types benefit from daily flossing, interdental brushing, and regular professional cleaning. Both need a soft-bristled brush and a non-abrasive toothpaste. Both are harmed by skipping the back side of the bridge, which is the most commonly missed area.
Canadian Dental Association information on dental implants
Common Mistakes to Avoid When Cleaning a Dental Bridge
The biggest mistake is skipping the space under the bridge because it feels awkward. That gap is exactly where problems start.
Other common errors:
- Sawing at the gum with floss instead of using a gentle up-and-down motion
- Using a hard-bristled toothbrush that wears down the gum line
- Pressing too hard with a dental pick and scratching the crown
- Relying on mouthwash alone instead of mechanical cleaning
- Skipping the back side of the bridge because you cannot see it
Post-Cleaning Inspection and When to See a Dentist
Check your work after every cleaning. Use a small mirror and good light. Look for redness, swelling, or food left behind. Run your tongue along the bridge edge to feel for rough spots.
See your dentist if you notice:
- Bleeding that lasts more than a few days
- A loose bridge or crown
- Pain that does not settle
- Bad breath that returns within hours of cleaning
Conclusion
Cleaning under a dental bridge is a small daily habit with a big payoff. It protects the teeth and implants holding your restoration in place. With a floss threader, interdental brush, and water flosser, you can keep the pontic space clear in minutes a day.
Frequently Asked Questions
What can I use to clean under my dental bridge?
You can use a floss threader with regular floss, super floss with a stiff end, interdental brushes, or a water flosser. A soft-bristled toothbrush and fluoride toothpaste clean the bridge surface and abutment teeth. For the pontic gap, a floss threader or water flosser reaches underneath. Your dentist can recommend the best combination for your bridge type and manual dexterity.
Can food get under a dental bridge?
Yes. The pontic sits above the gumline, leaving a small gap where food debris and plaque can collect. This is normal, but it is why daily cleaning under the bridge matters. Without cleaning, bacteria build up and can cause gum inflammation, bad breath, or decay in the abutment teeth. Using a floss threader or water flosser after meals helps dislodge particles before they harden.
Why does it smell under my dental bridge?
Odor usually means bacteria and food debris are collecting in the gap under the pontic. This bacterial biofilm produces sulfur compounds that smell. If you notice persistent odor despite daily cleaning, it may signal plaque buildup or early gum disease. A professional cleaning removes hardened deposits you cannot reach at home. Your dentist can check for any issues with the bridge fit.
How often should I clean under my dental bridge?
Clean under your bridge at least once a day, ideally after every meal. Flossing under the pontic with a threader or using a water flosser takes only a minute or two. Daily cleaning prevents plaque from hardening into tartar, which requires professional removal. If you have a history of gum disease or implant-supported bridges, your dentist may suggest cleaning twice daily.